July 27th, 2012 § Comments Off on Some things are worth the garlic breath § permalink
When I discovered that our CSA box this week contained a head of fresh garlic, it seemed criminal to just chop it up and toss it in a stir-fry. No, no, no, that just wouldn’t do. Not long ago I spent an entire Thursday afternoon at the farm pulling weeds from that never ending sea of garlic you see down below. Having helped to bring that head of garlic in to being, I didn’t want it going into some second rate dish, I wanted it to be the center piece of something wonderful. I wanted to make raw garlic carbonara.

It’s a delightful thing, and I am extremely tempted right now to just give up the recipe and be done with it. Maybe employ a little peer pressure: “Don’t wuss out, come on, everyone one else it trying it. What are you waiting for?! You should be cooking!” But I don’t think that I can in good conscience lure you, my oh-so trusting reader, into this glorious, eye-watering garlic extravaganza without full disclosure of the risks.
You see, raw garlic carbonara was one of the first recipes I learned to make from my very first vegetarian cookbook, The Passionate Vegetarian. Up until that point the vegetarian meals I had begun cooking for myself had seemed bland. I feel differently about vegetarian cooking now, but at the time I was plagued by an internal, nagging mantra of self-questioning: “Where’s the bacon? where’s the meat? where’s the excitement?!†Then I tried this pasta. The raw garlic made for a different kind of spiciness, one that was pungent and totally in my face, and unlike anything I had eaten. I am going to go out on a limb here and claim that my very first bite was a transcendent experience. That’s right, transcendent. It set a whole new bar for the level of flavor I was comfortable with adding to a dish.
And so for 8 months or so, maybe a year, I happily made this pasta almost every other week. Then I met Dave, and things started to get serious, and one night I decided that I would cook him my favorite meal. If he loved it, I thought, it could be our favorite meal together and wouldn’t that just be swell? In my girlish enthusiasm, I added one extra clove, and then another, and by the time I was done I think I must have added the entire head.
Can you see where this is going?

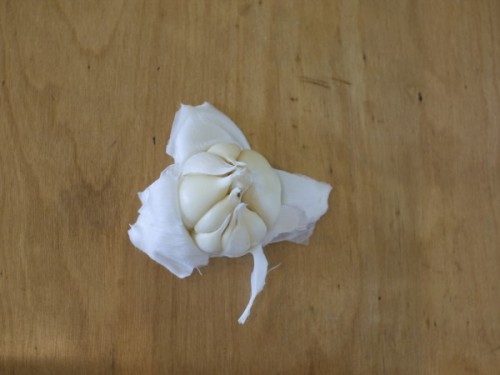
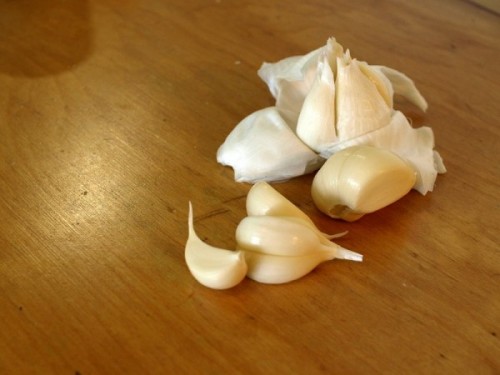
It was an extra spicy, extra special dish, and Dave and I devoured it enthusiastically. Little did I realize the curse I had wrought on our romantic evening. Halitosis… garlic breath!. Probably the worst I have ever, and hopefully will ever, experience. I know now that there’s not much to do but wait it out – wikipedia confirms it. Still, that didn’t stop us digging through my cupboards in search of some magical, date-night saving home remedy: Tooth brushing? it added a minty freshness, but did nothing for the garlic; Parsley? it tasted real nice, but still nothing; Suck on a stainless steel spoon? it didn’t work after the first 5 minutes, and it certainly didn’t work after a second 5 minutes.
Not that it mattered, in the end. Dave and I both really do love garlic. I wish I could say that was the last time that one of my meals went a bit overboard with the allyl methyl sulfide compounds, but I am not very good at learning that sort of lesson. Some things, I’ve decided, are just worth the garlic breath.
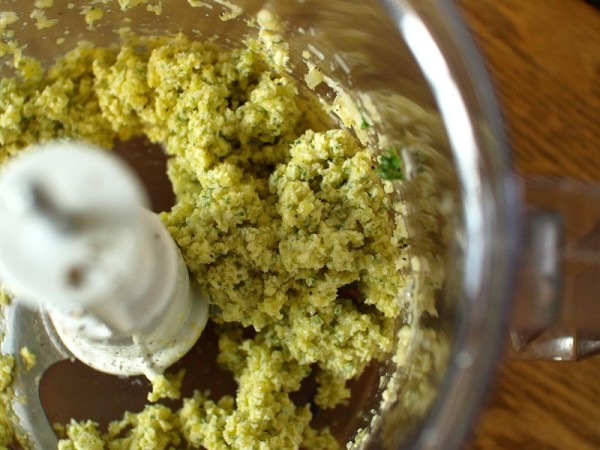

And yet, I recognize that it’s not for everyone. Or at least, that it’s probably not the best first choice for impressing someone you hope to kiss soon afterwards. So the other day I set about trying to make this recipe it a bit more accessible. I settled on adding only a couple of cloves of garlic raw, and then I sauteed the rest. The sauteed garlic adds a bit of sweetness and nuttiness, and really rounds out the flavor of the sauce. It still has the spiciness of the raw garlic, just toned way, way back.
Garlic Spaghetti Carbonara
Adapted from the Passionate Vegetarian
If you’re feeling like a solid, garlicky kick in the nose, I wholeheartedly encourage you to skip the sautee and try this recipe with only raw garlic. The strength of raw garlic can be a wee-bit unpredictable, but I think 6 or 7 cloves is usually a good number. Don’t be a hero.
In addition to the garlic, I should note that the egg is also intentionally raw to start. In a pasta alla carbonara like this one, the hot pasta takes a bit of the edge off the raw garlic, and cooks the egg just enough to bring the sauce together into a creamy, glorious mess.
350g / 12oz whole-wheat spaghetti or linguine
2 tsp olive oil
2-3 cups spinach or kale, washed and dried and torn into bite sized pieces (optional)
6 to 7 cloves garlic (or to taste), peeled and chopped into large pieces
1 large egg, raw
1/4 cup butter, softened
1/3 cup freshly grated parmesan or romano cheese
1 tbsp fresh basil
1 tbsp fresh parsley
dash of salt and freshly ground black pepper
Bring a large pot of salted water to a boil. Drop in the pasta and cook until al dente. Drain, reserving a bit of the extra pasta water in the process, and set aside.
If your are sauteing some of the garlic and/or adding greens: Heat a tsp of the olive oil in a large skillet over medium heat, about 3/4 of garlic, and saute until just soft but not yet brown, about 1-2 minutes. Remove the garlic pieces from the pan. Add your greens to the skillet and cook until they’ve just wilted, 1-2 minutes.
Combine garlic(s), eggs, butter, cheese, herbs, a dash of salt and a bit more pepper in a food processor. Pulse to combine until you achieve a thick paste.
Return the pot you used to cook the pasta to the stove and heat the remaining olive oil. Add the cooked pasta and the cooked greens (if using), stir over medium heat for about 2 minutes until the pasta is nice and hot. Remove from heat, and dollop the pasta with the garlic paste. Toss to combine, and if it seems a little dry, drizzle in some of the reserved pasta water. Top with a sprinkle of cheese, serve immediately.
Makes 3 – 4 servings
July 18th, 2012 § § permalink
I have been thinking about the rhubarb syrup in this cocktail recipe a lot over the last few weeks, ever since I first whipped it together in June. Not too sweet, with a wonderful sour tang, it just begged to be drizzled all over my favorite breakfast foods and late night snacks. That was until I drizzled it into a cocktail, and then another and another, until I forgot all about my many other plans. By the time I had perfected this beverage (and tested it once… or twice), not a drop of syrup remained. Oops.

I have been wanting to try my hand at this syrup again since then, but it was only just this week that I managed to get my hands on more rhubarb. I am sure that Dave is hoping I will use it to make him some sort of tasty pie, but he’s just going to have to wait . . . or at the very least harvest more rhubarb from his parent’s backyard.
You might be thinking that such a pretty pink beverage just screams “SUGAR“, but in this instance you’d be wrong. After a taste, no one would mistake this for anything but an adult beverage. It brings together the best aspects of a Gin & Tonic and a Pink Gin, but the rhubarb takes it somewhere entirely new. The syrup on its own is sweet, but not painfully so; mixed together with bitters and tonic you get something bright and refreshing, and surprisingly complex. It’s the sort of flavor that you want to sip and savor carefully, a quality that I look for in a cocktail. It makes me smile.
If liquor isn’t your thing, leave it out. This drink is just as nice without the gin. Mix it up with club soda to make a spritzer, consider stirring it into some homemade lemonade, or show more restraint than I did with my first batch, and try it poured over something else entirely.

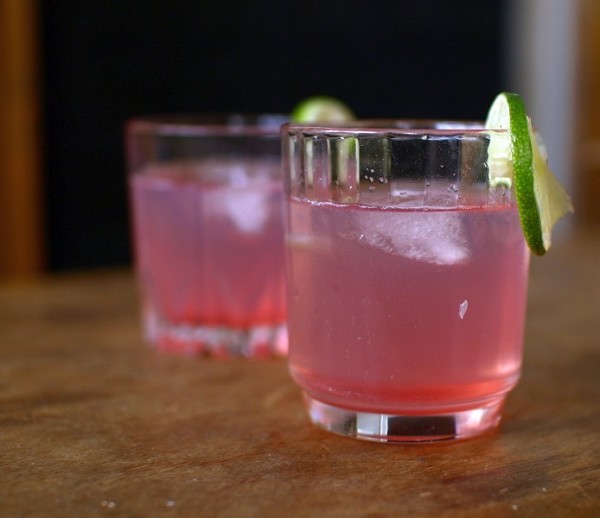
Pink Rhubarb Gin (& Tonics)
Syrup adapted from the Rhubarb & Rosewater Syrup at 101 Cookbooks. Rhubarb is a rare item in our house, so this syrup recipe is for a small batch, only about 1 cup. That’s plenty for ten or so cocktails, but you can easily double or triple the recipe to your needs.
Rhubarb syrup:
2-3 large / 1/2 pound rhubarb stalks, chopped
1 cup granulated sugar
1 cup water
2-3 tablespoons freshly squeezed lime or lemon juice
For the cocktails:
3 oz gin, or to your preferred strength
2-3 tablespoons rhubarb syrup, or to taste
squeeze of lime juice
tonic
angostura bitters
lime wedges
To make the syrup: In a medium saucepan, combine the rhubarb and sugar. Stir well, and leave to sit unheated on the counter for about 45 minutes, giving the mixture an occasional stir to help the rhubarb give off its juice.
Add the water to the saucepan, and bring to a simmer. Stir until the sugar dissolves, and then continue to simmer for another 15-20 minutes, until the rhubarb just starts to break down. Strain into a bowl; you can use damp cheesecloth to achieve an extra clear syrup, but a fine mesh strainer works just as well for me. You may want to discard the leftover rhubarb because it will be a bit overly stewed, but we enjoyed it stirred it into some yoghurt.
Return your syrup to the saucepan, first wiping it clean of any residue. Stir in the lime juice, and bring to a simmer again. Simmer uncovered over medium heat for 15 minutes or so, until the syrup has reduced and thickened. Remove from heat and cool completely before using.
To assemble your cocktails: Split the gin between the glasses, then add 1-2 tablespoons of the rhubarb syrup and a squeeze of lime juice to each glass. Stir quickly to combine. Drop in a couple of ice cubes, fill to the top with tonic, and add a dash of the bitters. Garish with a slice of lime.
Makes 2 short cocktails, with lots of syrup to spare
July 7th, 2012 § § permalink
I had only one goal for the Canada Day long weekend – to pick strawberries. At first my friends and I were determined to be fair-weather berry pickers. Surely, we thought that this being July, the rain might finally let up so that we could spend just one glorious, sunny afternoon in the fields. But as the weekend wore on, each day bringing with it yet more wet, our desire for fresh berries became increasingly rabid. So on Monday we donned our rain gear, packed ourselves like sardines into a tiny red car, and headed out to Westham Island to pick strawberries in the rain.
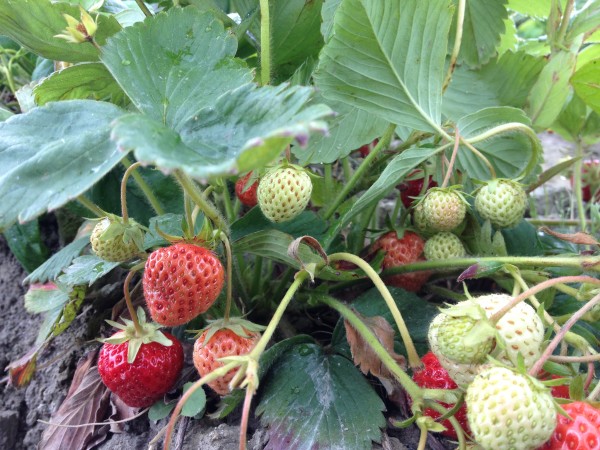
Presumably as a reward for our unwavering commitment to berries, the rain actually did stop by the time we arrived at the Bissett Farms U-Pick. And so we spent a pleasant afternoon under cool grey skies, appreciating the fact that we weren’t soaking wet.
In a typical summer, choosing to go berry picking at the end of the long weekend after countless hordes of families with small children have already descended upon the fields is a formula for certain disappointment. Thankfully, all the rain had kept that plague at bay and it was clear that the fields had seen very little recent activity. We found a bounty of perfectly ripe strawberries.

Berry picking is actually a reasonably new experience for me. Aside from the occasional foray into my grandmother’s raspberry bushes, I never really picked berries as a kid. I really enjoy the repetitiveness of the process – pick pick pick, shuffle shuffle, pick pick pick, shuffle shuffle – and I feel like I can just keep going and going along for quite some time. I thus have a very poorly developed sense of when to stop. This situation is not aided by my friends, who apparently have limitless enthusiasm for processing pound upon pound of berries. In one brief hour of picking my friends in the the caboose picked 30 pounds; our other pair of friends had 60 pounds! At the time, my 18 pound haul seemed pretty piddly in comparison.
At least that’s how I felt until I got home and tried to put all my berries in the fridge. Suddenly 18 pounds seemed like a lot of strawberries – especially 18 pounds of perfectly ripe, crisp strawberries that I feared would get soft and mushy faster than I could deal with them. So I recruited Dave to starting hulling and washing, and I spent the next two evenings freezing and jamming and snacking on the tasty morsels.
I made 3 different kinds of jam with all those berries. I used combinations of savory herbs for two of the batches, an idea I got from a recipe for ‘Strawberry Jam with Thai Herbs’ from Lianna Krissoff’s Canning for a New Generation. But my favorite of the three was this balsamic and black pepper jam. I made this one up as I went – unsurprisingly a quick google search revealed lots of similar recipes. Strawberry and balsamic is a well loved combination of flavours. I use Krissof’s strawberry jam method for all three batches, and it produced a very thick and glossy jam without the addition of any pectin.

Strawberry, Balsamic and Black Pepper Jam
Method adapted from Lianna Krissoff’s Canning for a New Generation. The balsamic vinegar in this recipe balances the sweetness of the berries and adds a lot of depth. I think it will pair well with some stinkier cheeses, maybe on a hearty rye cracker or whole wheat baguette. I love the good kick of spice added by the pepper, but you can certainly experiment with halfing the spice to create something a bit more subtle. Or, you could drop the balsamic and pepper completely and experiment with the herb route. For those new to jamming, I’ve included a pretty detailed description of the steps I take to sterilize and process my jars.
Makes about three 1-cup jars
3 pounds fresh strawberries, hulled and chopped (about 9 cups)
1 1/2 cups white granulated sugar
1/4 cup balsamic vinegar
1 teaspoon finely ground black pepper (or to taste)
Start by getting a very large pot of water on the stove for processing the jars. It needs to be large enough so that there will be at least 1-inch of water above your jars – I use a very large soup pot. That much water takes a long time to boil, so put it on first. At the same time, place a small clean saucer in the freezer. If you time this whole process well, the jars should be done just a few minutes before your jam.
When the water starts boiling, add your empty jars to the water to sterilize. If you don’t have a canning rack, place a cotton tea towel in the bottom of the pot. Make sure your jars don’t touch the bottom or sides of the pot. Place the lids and rings in a heat proof bowl, ladle in some of the boiling water to cover, and leave to sit. Boil the jars for at least 10 minutes, and then carefully remove, dumping out the water from each one before placing on a dish towel. Keep the water boiling in the pot for processing.
In a large pot or dutch oven over medium heat, stir the sugar in with the strawberries and bring to a simmer. Cook for 5 minutes, then strain the fruit through a fine colander, stirring the fruit a bit to loosen the juices. Return the juice to the pot and reserve the fruit.
Simmer the juice uncovered for 20 minutes, or until you have about 1 1/2 cups remaining. Return the strawberries to the the pot with the juices, and add the balsamic vinegar. Continue cooking for another 15 minutes. To check if the jam is done, remove the saucer from the freezer, place a dab of the liquid jam on the plate, and return the plate to the freezer for 1 minute. The jam will be stiff, but won’t quite gel.
Remove from the heat, and skim off as much of the foam as you can. Stir in the black pepper to your taste. It’s difficult to get a sense of the amount of pepper when the jam is hot, so if you want to check the flavor put a big glob of jam on the plate in the freezer for a minute. When it’s cool give it a taste, and add more pepper until you’re happy with the result.
At this point your jars should be ready to go. Fill each jar to within a 1/4 inch of the top (I know, that’s really full!). Put on the lids and tighten the rings to just finger tight – you want the air to be able to escape during processing. If you don’t have quite enough jam left to completely fill the last jar, place it in the fridge and eat within a few weeks.
Carefully lower your jars into the boiling water, again using a rack or a towel, and keeping the jars from touching the bottom or sides of the pot, or from touching each other. That last thing you want after all this work is for a jar to crack or explode! Process for 5 minutes – if you live above 1000 ft, add 1 extra minute for each additional 1000 ft above sea level.
Remove the jars from the water and place on a towel in a corner of the kitchen where they can be left undisturbed for 12 hours. After about an hour, check that the tops of the lids are fully sealed by pressing down on the middle of the lid – if you find one that pops up and down, place that jar in the fridge immediately and eat within a few weeks.
July 2nd, 2012 § § permalink
Supposedly, summer officially started last week. Someone clearly forgot to tell Vancouver, because it’s been wet wet wet for the last few weeks. People have taken to calling it ‘Juneuary.’ It’s a name that makes you chuckle for a moment when you first hear it, until that next moment when you realize oh no, it’s true. There’s some implicit hope in that name at least, that the true spring will follow soon enough. ‘Junetober’ would be far more depressing.
As a result of all this wet, crops all over the lower mainland seem to have been a bit slow to start. The folks at UBC farm only just started their Wednesday and Saturday markets last week, and with all the flooding in the valley last week, which ruined crops and set a number of farmers months behind schedule, local veggies may be harder to come by this year. Lucky for Dave and I, we signed up for a CSA box from the farm this year that should keep us pretty well buried in vegetables until October.

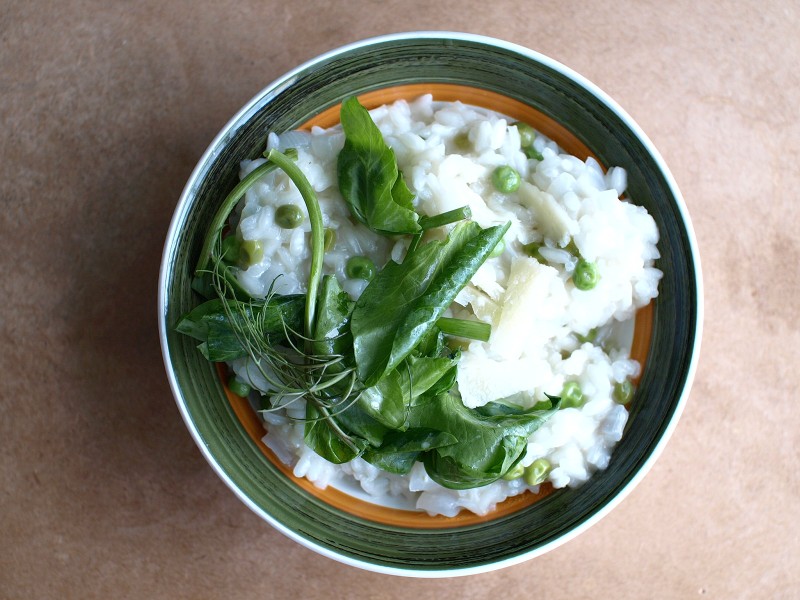
We received our first box last week, and it was full of tasty green things: spinach, kale, mesuna and ruby streak mustard greens, mint, green onions, and pea shoots. The pea shoots were perhaps the item I was most excited to see, and so on one of our currently rare sunny evenings I used them to make this risotto.
In my mind, this dish is quintessnetially linked with spring. It’s light and refreshing, and also comforting, which makes it perfect for those more typical spring days that cannot decide if they want to be sunny or rainy or both. These qualities come from the fresh pea shoots, stirred in right before you eat so that they retain their crunch and full flavor. Strictly speaking, the pea shoots aren’t absolutely necessary. You can make a delicious risotto with just the peas, but the pea shoots make this dish extra special.
Spring Pea Shoot Risotto
I am always surprised when I read that people find risotto intimidating. I’ve always enjoyed making risotto. It takes more constant attention than a lot of other dishes, but that’s balanced out by the fact that there’s typically very little prep involved. And for that 20 minutes or so of stirring there’s nothing else for you to do but relax, maybe listen to the radio, and reflect on your day.
6 cups of veggie or chicken stock (salted if homemade)
1-2 tbsp olive oil
1 small white onion, diced
2 cloves garlic, crushed
2 cups unwashed Arborio or Carnaroli rice
1 cup dry white wine
1/4 cup butter
1 cup peas, fresh or frozen
1/2 cup parmesan cheese, finely grated
2 cups pea shoots, torn into bite sized pieces
1/4 cup of fresh parsley, chopped (optional)
Heat the soup stock on the stove in a medium saucepan. It needs to be hot, but not boiling. Add the peas to the hot stock, and let them just cook through – you want them to keep their bright green color. Remove the peas with a slotted ladle and set aside.
Use a large bottomed saucepan or a frying pan with high sides to make the risotto. Over medium heat, saute the onions in the olive oil until soft, but not brown, about 5 minutes. Clear a space in the middle of the pan and add the diced garlic to cook for just a minute.
Next, add the butter to the center of the pan, let it melt completely, and then stir in the rice to coat it with butter. Now the stirring starts. Keep the rice moving just enough so that it doesn’t stick to the bottom of the pan. Cook the rice until it start to turn translucent, about 3-5 minutes.
Next, add the wine and stir until it has been totally absorbed by the rice. Begin adding the stock a couple of ladles at a time, and gently stir the rice until the stock has been absorbed. Repeat this process until the rice is cooked, but still al dente, about 15 – 20 minutes. You’ll likely use all the stock.
Remove the risotto from the heat and stir in the peas, parmesan cheese and parsley. Cover and let rest for 5 minutes. Serve in bowls, with a big pile of pea shoots on top, along with and some slivers of parmesan cheese.
Serves 4 as a main.
Note: Another tasty variation on this recipe, which requires only slightly more work, is to make your pea shoots into a pesto to stir into the cooked risotto. Combine half the pea shoots, 2 tablespoons of olive oil and a bit of lemon juice in a blender or food processor, and blend until smooth. Stir in the pesto at the same time that you add the parmesan and whole peas.


